Pages

Monday, February 28, 2011

What I Live For - Book Review and Order

What I Live For
I really enjoyed reading her review of this book. It sounds so interesting that I hopped over to Amazon and ordered myself a copy of the book.

What I Live For: “Life, In Spite of Me” Book Review: "After opening the book “Life, In Spite of Me”, I really struggled to put it down, taking it everywhere with me and reading it every chance I..."

Also, as a result of reading her post about the book I have decided to sign up. In 10-14 days I will be receiving my first book to review.

Wednesday, February 23, 2011

How Many?


How many indeed.
Several people commented on my last post and asked if I am making 1 or more afghans.

Excellent question.

Kind of wish I knew the answer.

I originally planned on making 1 big afghan or 2 mediium sized afghans. I wanted to have 1 on my bed or 1 for downstairs and 1 for the bedroom. My other thought was to have/make 1 for my bedroom and 1 for a friend and give it away.

1 big afghan is approx. 5 or 6 12-inch squares across and 5 or 6 12-inch squares in length. So, if I make an afghan that is 5x6 12-inch squares I need 30 squares.

However, I'm having so much fun making the squares that I've made the equivalent of about 10 squares in Jan and Feb each give or take a square.

This means I'll have approx 120 12-inch squares.

Whoa! That's too many squares. That will make 3 or 4 afghans. Far too many squares and far too many afghans. So, yeah, I don't know what I'll end up doing from this point on.

At a minimum I'm going to make 2 12-inch squares, 2 filler squares and 4 6-inch squares.

I'll have a bunch of yarn leftover each month.

What will I do with all that extra yarn? Scarves? Hats? I just don't know.

I guess we'll have to wait and see
and
you'll just have to wait to see and wait to read.

Until then

Namaste

Tuesday, February 22, 2011

February is Over

It's over?
But it's only the 22nd?

Yeah, well as far as the Ravelry 2011 Crochet-Along is concerned, February is over.  We were challenged to create these three squares.

6" = Brighter Daze by MG's Design
12" = Pineapple Blossom by April Moreland at the Dishcloth Diaries
12" filler = Grandma's Heart by a lovely lady named Carola.  I'm not sure, but I think the pattern is only available on Ravelry (free to join)


These were all really fun to make and in their own way challenging.  

My first attempt was with the Pineapple Blossom.  


The lighting wasn't great for the photos. 
I actually had a combination of inside light and outside light going on.  The sunshine was peaking in but not enough to give me full light so I had to turn on the overhead lamp. 
Pretty.  Right?  I really liked this pattern.
I'm making an afghan for my mom and I'm going to use this pattern as one of the 2 that I will use.

Second attempt was with the 6-inch square - Brighter Daze 
It was a little complicated to understand at first, but once I got a hang of the pattern,
it was a breeze.


The last attempt was the Grandma's Heart Square.  The pattern for this square looked really complicated at first.  It was written using UK instructions.  No offense to any of my followers who may be int he UK, but your stitch names/counts are weird.  Not a major deal but for instance, they call a double crochet a treble crochet and yet it's the same method.  (odd) ... but I digress....

Thankfully, this pattern also came with a crochet chart.  So, even though you UK folks call your stitches by different names the chart symbols are the same.  Ahhhh... So, here are the two squares I made.

Aren't they all so pretty?  As you can see, I chose appropriate colors for February - red, pink and white.  I think the combination of colors came out very nicely.  

Here is a shot of the squares laying together.


These squares will all eventually be combined with my January squares and all future squares for this Corchet-Along. 

March squares will be shades of green in honor of St. Patty's Day. 

Sunday, February 20, 2011

One Little Word - Trust

My ladies Bible study group - we call them Small Groups - is doing an intersting study.  Now just about all of us are doing it.  Some of them are on it for the 3rd or 4th year.  I'm doing it for the second year.  It's called the One Little Word Study.  The concept of simple and yet complicated all at the same time.  My word last year was Transform.  I've been going through a lot of changes and I felt that was an appropriate word.  I'll have to blog more about that on another day. 

This year, my word is Trust.  It's only February so I am not that far into my own personal study but I'm already learning something.  Trust is carried and used in different ways.  For instance, we all say we Trust God but I noticed in the bible that when the words Trust and God or Lord are in the same sentence it's more of an action such as "Trust in the Lord" or "Trust in God".  That's very different to me.  It's like going from a noun to a verb use of the word.  It takes on completely different meaning to me.  I'm nowhere near done studying for it but in the meantime I have created an affirmation board to help me with my focus.

My friend D is a very creative person.  She creates all types of art.  One piece of art she designed for all of us to work on is called Metal Art.  She talks about it and gives a complete tutorial here.

So, yesterday I went to D's house and created some Metal Art for myself to focus on.  I gave you a brief glimpse yesterday.  Before I go on, I have to give a lot of credit to Ds daughter. V - she's really talented and nice.  She helped me out with just about every step from picking the size of my board, background colors, application methods and even helped me with a few corrections.  I'm a loner and like to do things on my own but working with V was really enjoyable.  I liked talking with her.

So, here we go.  I started out by picking the letter styles that I wanted.  I really like Small Caps so I tried to find letters that were just small version of capital letters.

It started out as this with the letters and extras laid out on the table.


Then we moved the letters to the board. V helped me glue the labels to the board.
I ditched the top flower.  I don't remember why. 
I'm not sure, but I think the board is really a simple piece of cardboard.
Pretty cool use of cardboard, huh?


Then, we glue aluminum foil (that's right aluminum foil) to the baord and around the letters.
This was fun and a little hard.  Hard because my natural instinct is to make it neat
but the idea is for the foil to be crinkly and messy.  Once I started intentionally making wrinkles
it became much easier and actually a little fun.

The next step is to paint the letters.  I chose silver.  V helped me to paint the letters.
Then when I was done and looked at it my first thought was -
"Crap, I've just painted aluminum an aluminum color.  How stupid"
V talked me into sticking with the color.  I'm glad she did. 
You can just barely see the difference between the aluminum foil color and the silver paint.
The next step is to paint the background. 
V helped me a lot by putting droplets of the paint down and helping me to paint the background. 
I kept trying to paint but what you really want to do is schmear and dab and just move the paint around. 
I forgot to take pics during this process.  I wish I had. 
We had some neat little puddles of paint as we moved along from top to bottom. 
The end result is this

I still need to buy a frame to put it in.
I'm so pleased at how the letters for TRUST pop off the board.

It's beautiful and I love it!  I can't wait to make another. 
I never made one for my word last year.  I think I'd like to make one.
This was a very fun day and a really easy project. 
Many many thanks to D and her daughter V for making this project and making it a fun day. 

One last picture.  This was taken by D. 
She has a much better camera than I do.
She was able to capture some of the cruchy details that my iPhone didn't capture.

Saturday, February 19, 2011

One Little Word

in God I trust and am not afraid. What can man do to me?
Psalm 56:11

Tuesday, February 15, 2011

Top Ten on Tuesday - Stress

I got this idea from the Crafty Life woman. She does this every Tuesday. The idea is to write briefly about ten things today.

Photobucket" />


So, here goes. Top Ten things stressing me out:

1. Stink bugs I can’t stop thinking about the stink bug I found this morning. Where there’s one there are more. I don’t know how I’m going to deal with it. I read that cats are great stink bug killers, but my cat seemed completely uninterested this morning. She just sat there and stared at him and watched me freak out. Sigh….

2. Marathon - I registered to walk the Pittsburgh ½ Marathon this year. Today is exactly 3 months from the race date. I’m seriously undertrained for this event. Ugh…

3. job - I actually can’t talk much about what I do. I’m a security engineer and I do NIST/FISMA based assessments. I don’t work in DOD but I do sign non-disclosure agreements so I can’t talk about what I’m working on. Also, because the Internet is a big creepy world, I can’t talk about work because it can be used against me and I could get fired. Speaking of fired – I haven’t been fired, but I may be making a change. That’s all I can say.

4. Budget - I feel like I’m spending too much money lately. I haven’t been buying much but I’ve gone away from using cash for everything to using my debit card. I swipe here, there and everywhere. Just feels like too much spending. It really is true that if you use cash you’re less likely to spend the money.

5. Mammogram - I turned 40 last year and I am due to have my first mammogram this year.

6. Exercise - I have not been exercising lately. I’ve lost my exercise mojo. I’m not sure how to get it back. If I don’t get off my ass, I’m going to be screwed when #2 above comes calling.

7. Vehicle - this is a minor stress but I think I have some expenses coming up. I’ve got a crack in my windshield and she hasn’t been idling properly lately. She rev’s for no reason at all.

8. Summer - Summer is coming which means shorts, bathing suits and the beach. Need I say more?

9. Diet - This goes along with #2 and #6. I just seem to have lost my mojo and can’t find it.

10. This list - Probably not a fair point for the list but I actually found this a hard lit to create this morning. I guess I’m not all that stressed. Which is a good thing. :-)

So, there you have it. My Tuesday List. So, what is on your mind today?

Stink bugs

Just found my first stink bug in my house. In my bathroom. My mom and bro told me months ago to just snap it up in paper towel or tissue and toss it into the toilet. I have a major bug phobia. It freaked me out. There's no way I can do that. I'll spare you all the details but it ended up on a pair of skivvies. With the help of a grabber (might as well be a 10-foot pole) I was able to pick them up and flick the bug into the toilet.
Do any if my followers have suggestions on killing them? Is there a bug spray?
I'm sure if there's one there will be more.
This is gonna suck. 

Monday, February 14, 2011

Say it with Chocolate and Strawberries

Thinking of buying the one you love some chocolate covered strawberries for Valentines (or any special day).
Stop!
Pop over to Mango & Tomato and make some yourself.
The recipe and procedure is easy.
It'll save you money and last
Nothing says love like something you make yourself.

So, don't buy the gift, make them for your Love.

Sunday, February 13, 2011

And The Greatest of These is Love


Happy Valentines Day
Love is patient
love is kind.
It does not envy
It does not boast
It is not proud.
It does not dishonor others
It is not self-seeking
It is not easily angered
It keeps no record of wrongs.
Love does not delight in evil but rejoices with the truth.
It always protects, always trusts, always hopes, always perseveres.
Love never fails.

1 Corinthians 13:4-8


Tuesday, February 8, 2011

Valentine Inspiration

How is your Valentine’s Day plans coming? Are you feeling overwhelmed or underwhelmed by the media? It just bugs me that the media spends so much time focusing on this holiday. Are we really in special relationships just because a BF or DH buys us jewelry at Jared’s or Kay Jewelers? Is your relationship insignificant just because your BF or DH does not celebrate the day along with Hallmark, Jared’s or Kay Jewelers?

I’m doing a One Little Word study this year. This is my second year doing the study. There are several churches around the country doing this type of study. One church has been doing the One Word Study for five years. The idea is that you pick a word and you study what the world thinks the word means and you study what the Bible says about the word.

So, why am I telling you this? Last year my word was Transform. My scripture:
Do not conform to the trappings of this world but be transformed by the renewing of your mind – Romans 12:2

I adjusted the scripture a little. The Bible does not use the word trappings but I really think that often the world traps us. Like with Valentine’s Day. We’re made to feel inadequate because we don’t have a BF or a DH or if we have a BF or a DH he’s not good enough because he isn’t buying us flashy expensive things.

So, my advice to you: Do not conform to this world and get bogged down and stressed out about Valentine’s Day. Do something for someone else. Take the focus off yourself and onto something or someone else. Go help out at a women’s shelter or soup kitchen. Make valentine’s for your friends. There are so many easy inspirational ideas on the Internet. Here are just a few Valentine’s Inspirations that are easy to make.

Crocheted Valentines - cute ways to send your friends a valentine card. These remind me of the ones we used to make and pass out in first grade.
Valentine Pins – make one of her tiny hearts, buy craft pins, glue them to the back and distribute accordingly OR make several stitch them together an stuff with cotton filling to make sachets.
Valentine Hearts - these foam hearts would make great decorations.
Gift Tags - a nice accessory for your gift or just a cute item to give away to a friend.
Heart Pins - make a few small ones, add craft pins and distribute to friends.
Sweet Heart Garland - these make great hearts for garland, bunting or pot holders.
Granny Hearts - these make great hearts for garland, bunting or coasters. Who can be sad when you have your morning coffee sitting on a heart coaster?

So, go now, there’s plenty of time to whip up any of the above ideas and share them with people around you. Transform yourself for this holiday and don’t let it suck you in.
This year my word is Trust. My scripture:
In God I will Trust. I will not be afraid. What can man do to me? Psalm 56:11
(I’ll be blogging more about this in a few days)

Monday, February 7, 2011

Ta Dah! January is Over


January is over, but I've been so busy with my Valentine's Project and the Crochet a Rainbow project that I haven't had a chance to take pics. I am participating in the Ravelry Block a Month Mystery Crochet A Long project.

So, here are my squares. The group has 1000 members. I've seen snippets of people's squares around the Internet. We were given 2 squares as options to make. I made several of all of them.


12-inch Square = Maggie's Square - I made 4.

6-inch square = Flower Button Granny - I made 10 of these. Got a little carried away. It was a really easy square.

filler square = Enough Love to Go Around - I made 2. This was a really cantankerous square, but in the end, it came out looking pretty darned good.


Aren't they pretty?
Would you like a sneak peak at my ideas for assembly?
I will probably change my mind 12 times in the next 12 months, but for now, I have three ideas. Let me know what you think.


I can't decide whether I like the one above
or below
the best


I don't like the one below. It was a passing idea, but just doens't thrill me.


Ta Dah! Hooking for a Cause


I've finished another project. 
This one is based on the Basic Granny Square pattern that I posted recently. 
I have been Hooking for a Cause for the past two weekends.

I have made 20 granny squares.
They will be winging their way to Queensland, Australia tomorrow.
Wonder how much it'll cost.
This will be interesting trip to the Post Office Tomorrow.


Almost enough there for an lapghan.
Aren't they pretty. I made them using yarn from my Stash. The sad thing - I still have PLENTY of yarn left over. So, who knows. May be I'll make a bunch of grannies for myself and make an impromptu throw.

Saturday, February 5, 2011

Ta Dah! Valentines Part 2

As I said the other day, I finished my Valentine's project.

First, I want to give a piece of advice to anyone who is thinking of making a massive amount of gifts for a large group like a Bible Study or Women's Group.  DO NOT WAIT until the night before to assemble.  I was planning to making little heart sachets for each of the women in our group.  We have anywhere from 20-30 women.  So, i planned on making 25 (this is a mistake took, but I'll get to that in a minute).  It only took me approximately 10-15 minutes to make each side of the hearts. It took a little longer to assemble all the pieces together.  Then again, I was assembling 50 hearts together.   I was up very late the night before finishing the assembly.

It was totally worth it though.  I think everyone really liked it.  My other mistake was not making enough.  The lesson learned here is if you're part of a group that grows and shrinks, don't make enough for the 'average' number that shows up.  Sure as the sky is blue, the night you plan something special, twice as many people will show.  If I ever do this again, I will be making enough for our entire group size (which is 35 at the moment by the way) plus 5. 

I know some of you have wanted info on the patterns.  I don't have step-by-step instructions to give you.  I used 2 main patterns for the hearts.  As I was hooking along and making them larger, smaller, wider, etc. I modified the patterns.  The modifications aren't enough that I can claim it as a whole new pattern. 

I used three but these two below are the main inspiration for my projects.
I used this pattern to make two sides a front and back like this purple one - Heart Pin pattern

I also made some front and back versions of the Love Hearts like these ones

Both patterns were really easy.  I personally liked the Love Hearts pattern best but the Heart Pin pattern worked up the quickest.  In the end, I ended up making more using the Heart Pin pattern.

If you look closely at this picture, there are some pretty ideas for borders.  The pattern for Bella's Sweet Hearts made really beautiful hearts, but they were too big.  I think they were too big  because of the hook, yarn and my guage.  Anyway, I tried modifying the pattern to make smaller hearts but i couldn't quite make it work.  They looked like sloppy hearts so I scrapped the idea.  However, I did still use something from Bella's site.  If you look closely at the pic below, you can see different patterns/styles for the borders.  I used that pic as a way to make some different patterned borders of the hearts as I assembled them. 


The assembly part was easy but more time consuming.  Basically I used either a SC or SL ST to assemble the front and back pieces together.  Once I was 3/4 of the way around the heart I would stuff it with fiber-fill and add a few drops of Rosewood Essential Oil.  I love the smell of this oil.  It has a very beautiful flower smell.  It makes a whole room smell very nice.  I used about 6-8 drops in each sachet.

So, that is the story of the sachets.   Have fun making some for yourself.  It really is worth it to make something for someone else.  I have really enjoyed this project.

Wednesday, February 2, 2011

Ta Dah! Valentines Part 1

I'm finally finished. 
Individually stuffed and scented with Rosewood essential oil.
Our Small Group Bible Study is tomorrow night.  
I hope I made enough.
It's late and I'm very tired.
Details and links to follow later.


Some Assembly Required

Tonight is the night.  I have been furiously crocheting for 39 days.  

Here is a sneak peak at what I've been working on.
I'll be spending tonight stuffing and assembling.  

Will post finished photos and links to the patterns I used later.


Basic Granny Square

The 
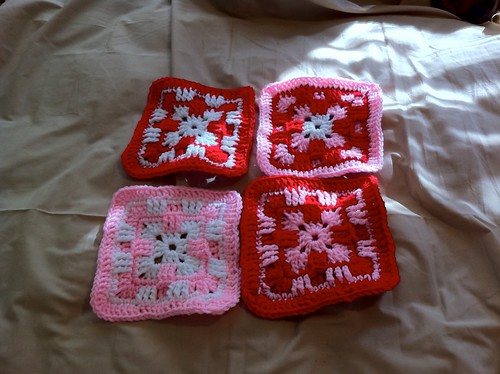
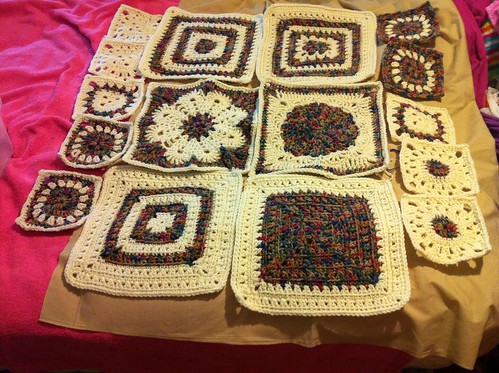
other day I posted that I am making squares for the 
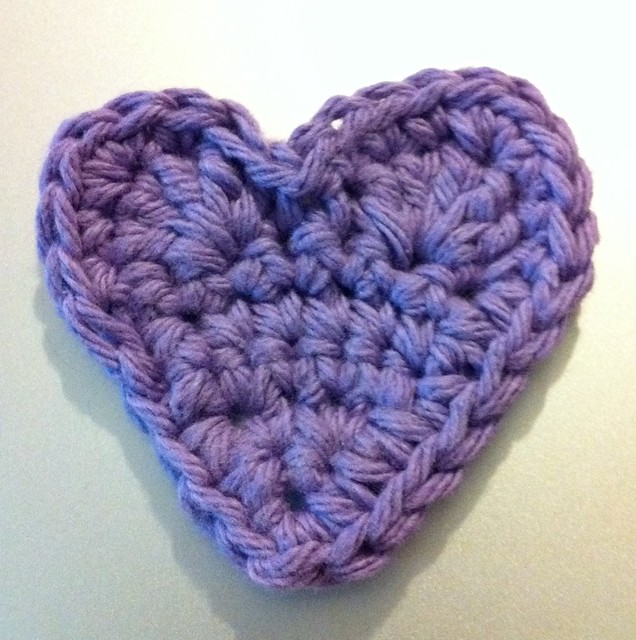
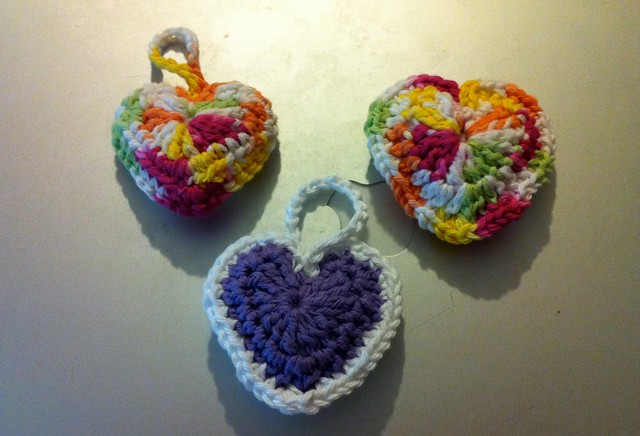
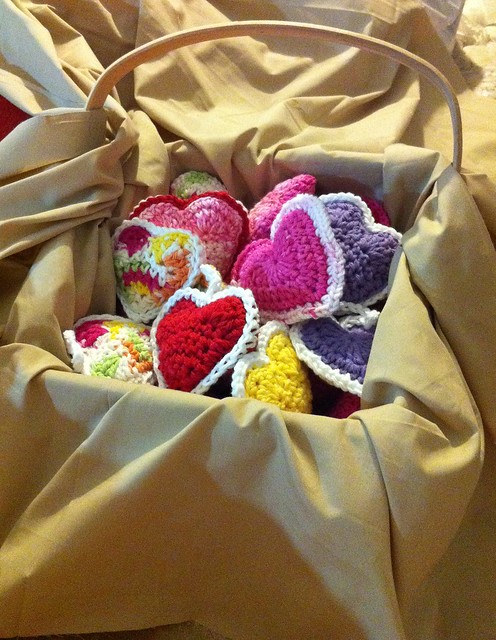
Crochet a Rainbow project. I spent this past weekend going through my stash of half-skeins and partially started projects and made a bunch of squares. I think I counted 15 squares in all. I have some more yarn in my stash but I won’t have time this week to make any more squares. I have to finish up my 
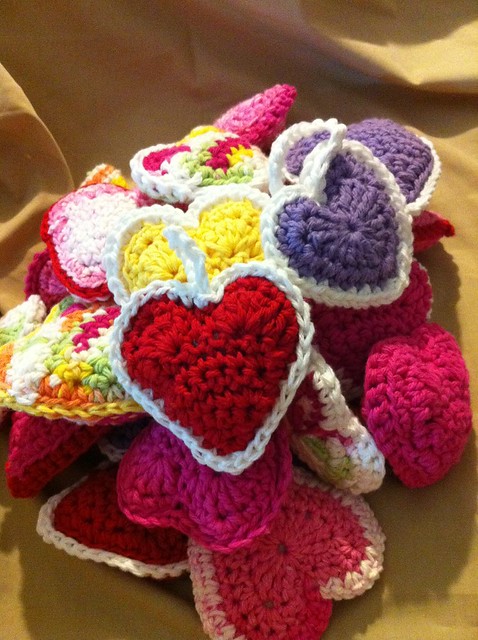
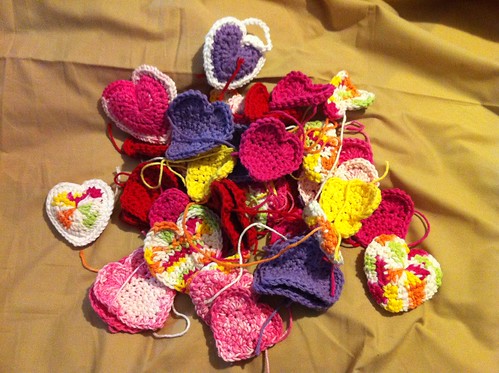
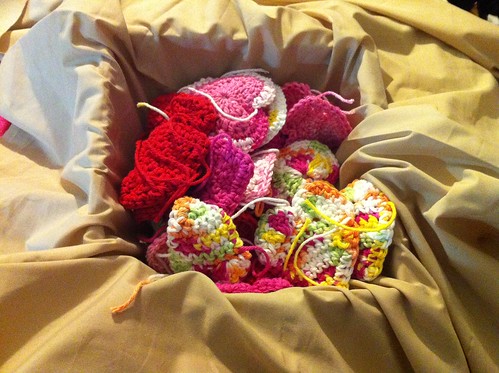
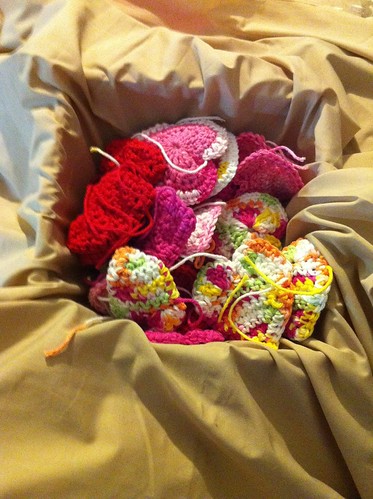
Valentine’s Day surprise and I am woefully far behind. I haven’t finished weaving in the stray ends. I don’t know why I wait until the end to do this but I always do. It doesn’t take very long to weave in the ends but it sure seems like it when you’re looking at a pile of 15-20 squares and they all have at least 2 strands that need to be woven in.

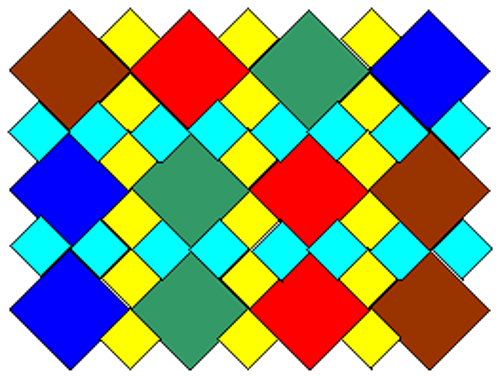
It got me to thinking about how easy the granny square is. I thought I’d go ahead and include a basic pattern here. Mainly because I can’t think of anything else to write about today.

So, without further ado – here are the basic instructions for making a granny square. I don’t have any photos of the process. I may take some photos and add them later.

This pattern or method can be done with any weight yarn and any size hook. The yarn and hook you choose should complement your project accordingly.

Terminology (US)
YO = Yarn Over:  Loop the yarn "over" the hook

CH = Chain Stitch: YO and pull the yarn through loop on the hook

SL ST = Slip Stitch: Insert the hook into the chain, YO, draw the yarn through the chain and through the loop that is on your hook in one movement.

SC = Single Chain: Insert the hook into the chain, YO, pull the loop back through the chain (2 loops on the hook), YO, pull the yarn back through both loops on the hook.

DC = Double Chain: YO, insert the hook into the chain, YO, pull the loop back through the chain (3 loops on the hook), YO, pull the yarn back through 2 of the loops on the hook, YO and pull through the remaining 2 loops on the hook.

INSTRUCTIONS (untested)
CH 4. Join with with a SL ST.
Some instructions state to CH 5 but I like doing it this way to make the center hole smaller. You could also use a magic circle to get started if that works for you

RND 1: CH 3 (counts as DC), 2 DC into center of ring, CH 2; **3DC, CH 2** (repeat ** 2 more times). Join with a SL ST to the top of the beginning CH 3.

RND 2: SL ST in the next 2 stitches to the corner. Change colors (optional).
CH 3 (counts as DC); 2 DC into corner, CH 2, 3 DC, CH 1
In next CH 2 space (corner)
**3DC, CH 2, 3DC, CH 1 ** (repeat ** 2 more times)
Join with SL ST to top of CH 3

RND 3:
SL ST in the next 2 stitches to the corner. Change colors (optional).
CH 3 (counts as DC); 2 DC into corner, CH 2, 3 DC, CH 1
In next CH 1 space (between 2 sets of DC below)
3 DC, CH 1
In next CH 2 space (corner)
**3DC, CH 2, 3DC, CH 1; in next CH 1 space 3DC, CH 1** (repeat ** 2 more times)
Join with SL ST to top of CH 3

RND 4 & 5:
Repeat RND 3 doing the following
In each CH 1 space – 3 DC, CH 1
In each CH 2 space (corner) – 3 DC, CH 2, 3 DC, CH 1
Join with SL ST to top of CH 3

5 Rounds for a Granny Square will generally make a 4-1/2 to 5-inch square. It all depends on your gauge and the size hook chosen. We were all asked to make squares that are 5 rounds for the Crochet a Rainbow project.

What Now:
3 Rounds for a Granny Square once joined can make a nice scarf or a baby blanket.
5 Round Granny Square can be joined with other squares to make nice afghan throw or “lapghan”.
6-8 Round Granny square can be joined to make a larger afghan for a small bed.
10-12 Round Granny Square can be joined to make a nice sized afghan for an adult bed (double or queen size)

Of course, this again all depends on the type of yarn you use, the size of your hook and your gauge.

LinkWithin

Related Posts Plugin for WordPress, Blogger...